Introduction and Challenges
Core Challenge: The pelvis has a complex anatomy, acts as a weight-bearing structure, and reconstruction carries high complication rates.
Traditional vs. 3D Implants: Traditional modular hemipelvic endoprostheses have a complication rate of around 45% (15% infection, 9% dislocation). Patient-specific 3D-printed implants show promising early and mid-term results with less loosening or breakage.
Core Principle: 3D implants solve the geometric problem, but they do not solve the biological problem.
Classification: Enneking–Dunham Pelvic Resection Classification
Type I: Iliac resection.
Type II: Periacetabular resection.
Type III: Ischiopubic resection.
Type IV: Involvement of the sacral area.
Production Stages and Design
Data Collection: The patient's CT scans must be in DICOM format. Thin slice thickness is ideal (optimum 0.5 mm).
Modeling: DICOM data is converted to STL (Standard Tessellation Language) format. 3D design and surface adjustments are made using software like Mimics or Solidworks.
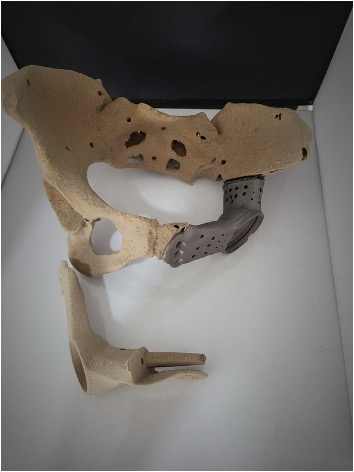
Pre-op Planning: Printing a physical 3D model before production allows the surgical team to test for anatomical fit, screw placement/angles, and feasibility with the planned surgical approach.
Materials: Options include Titanium (e.g., Grade 23), steel, PEEK, polyethylene, and polycaprolactone.
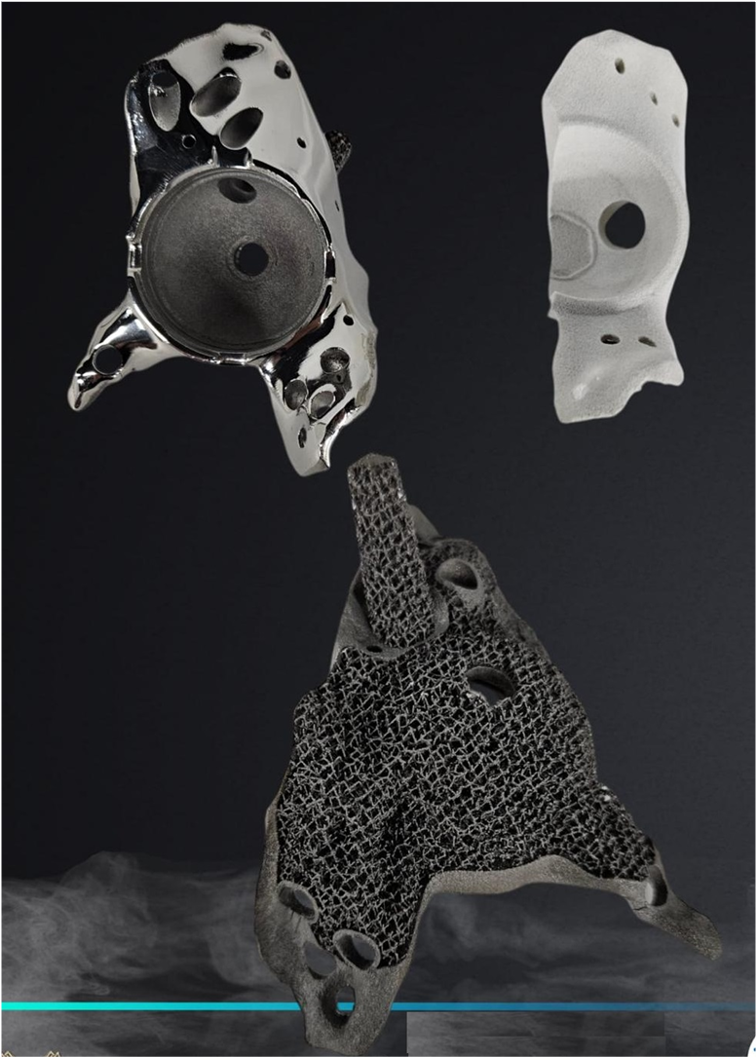
Production Techniques: Electron Beam Melting (fusing metal powder via electron bombardment), layered 3D printing, and CNC milling.
Acetabular Reconstruction Characteristics
Design: A "Triflange" design conforming to the anterior and posterior column anatomy is preferred.
Triple Defence Strategy: Aimed at providing mechanical stability, rapid osseointegration, and biofilm prevention. It consists of:
SLA Surface (Sandblasted Large-grit Acid-etched) with a trabecular structure.
Silver Ion Coating.
Local Antibiotics (e.g., applying Vancomycin into implant gaps).
Post-Printing Processing: The implant undergoes HIP (Hot Isostatic Pressing) at 1000 degrees under 100-200 MPa pressure in argon gas. It must also include drainage channels for hematoma evacuation.
Biomechanical Principles and Surgical Pearls
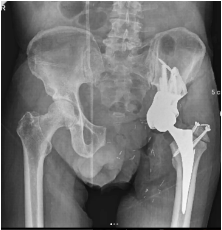
Load Transfer: Mechanical loads should be directed to the sacrum.
Fixation: Utilize S1–S2 corridors. Aim for multiple cortical purchases with divergent screw placement; prefer long screws over short ones.
Porosity: The layered structure should have a pore ratio of 60-70% for ideal load transfer.
Golden Rule: A larger implant equates to a higher risk of complications.
Topology Optimization and Stress Shielding
Massive implants made from heavy alloys place extra load on the pelvis and absorb most of the stress, leading to bone weakening (stress shielding).
Topology Optimization (TO): Ensures 3D implants are not just patient-specific, but also optimized for reduced weight. By targeting maximum rigidity and minimum volume, unnecessary material is removed to achieve an optimal material distribution.

Future Perspectives
AI-supported design, antibacterial surfaces, and biological integration.
More flexible designs using Negative Poisson's Ratio materials and auxetic concepts like the Re-entrant Chiral Structure (RCS).